DIY Make Your Own Soy Wax Candles | Eco-Friendly

Homemade Mason Jar Candles For Your Wedding
Making your own environmentally friendly soy wax candles for an event or home use is super easy. Follow these step by step instructions and you'll have yourself a big batch of long burning soy wax mason jar candles in no time. As an added bonus, we'll show you how to easily hang the candles as pendents from trees to make any night or evening event extra special.
What You Will Need
- Soy Wax
- Mason Jars
- 6" or 8" Wicks
- #10 Can(s)
- Medium Saucepan
- Large Plastic or Metal Spoon
- Oven Mitts
- Kitchen Thermometer
- Painter's Tape
- Knife
- Long Scissors
 |
| Mare Sure To Stir Right Away |
How Much Wax And Why Soy Wax?
Approximately five pounds of wax will fill seven pint jars full and will burn for a very long time. If you fill the jars to about the level (apx. 2") in our photos, you'll get about fourteen jars from five pounds of wax.
Soy wax candles are more eco-friendly than candles made from paraffin. Here's a nice blog post about the benefits of soy vs. paraffin. They burn cleaner and much longer than paraffin wax candles.
Getting Started
Bend The Can
You will want to add a slight bend (see photos) to the lip of your #10 can(s) to make it better for pouring the hot wax. You should be able to do this by hand without much trouble.
Melting The Wax
Melting the wax takes a bit of time and it will take even more time for the wax to cool down to the proper temperature. If you pour the wax before it cools down to the right temperature (130-140°F), your candles will have pitting and spots where the wax separates from the glass.

Double Boil
Start by getting some water in your saucepan (about 1 inch) and place the #10 can inside. Place on high heat and add your wax to the #10 can after the water heats up. If you're working with only one #10 can, you'll want to work in half batches (add less wax) instead of filling the can to the top like in the photos. We are going to split the batch between two cans when it comes time to pour so we're heating up a lot.
You'll want to stir a lot as the wax first melts or else it will form a large ball of unmelted wax in the center that will take a long time to melt.
Stop heating the wax once it's entirely melted. At this point you can check the temperature but it's sure to be well above the 130-140°F threshold.

Stop heating the wax once it's entirely melted. At this point you can check the temperature but it's sure to be well above the 130-140°F threshold.
Prepare Your Jars
While the wax is melting, or while you are waiting for it to cool, you should start to prep your jars. Some people like to use hot glue or double-sided tape to hold the wicks to the bottom of the jars, but wax works too, and we just so happen to be melting a lot of it right now!

Secure Wicks With Wax
Dip your wicks in the wax and quickly stick to the center inside your jars. The perfect wicks for pint sized jars are 6" but we are using 8" this time because we had them left over from when we made taller candles. You can use a chopstick or pencil to help seat the wick properly. If one doesn't stick, just try again with more wax.

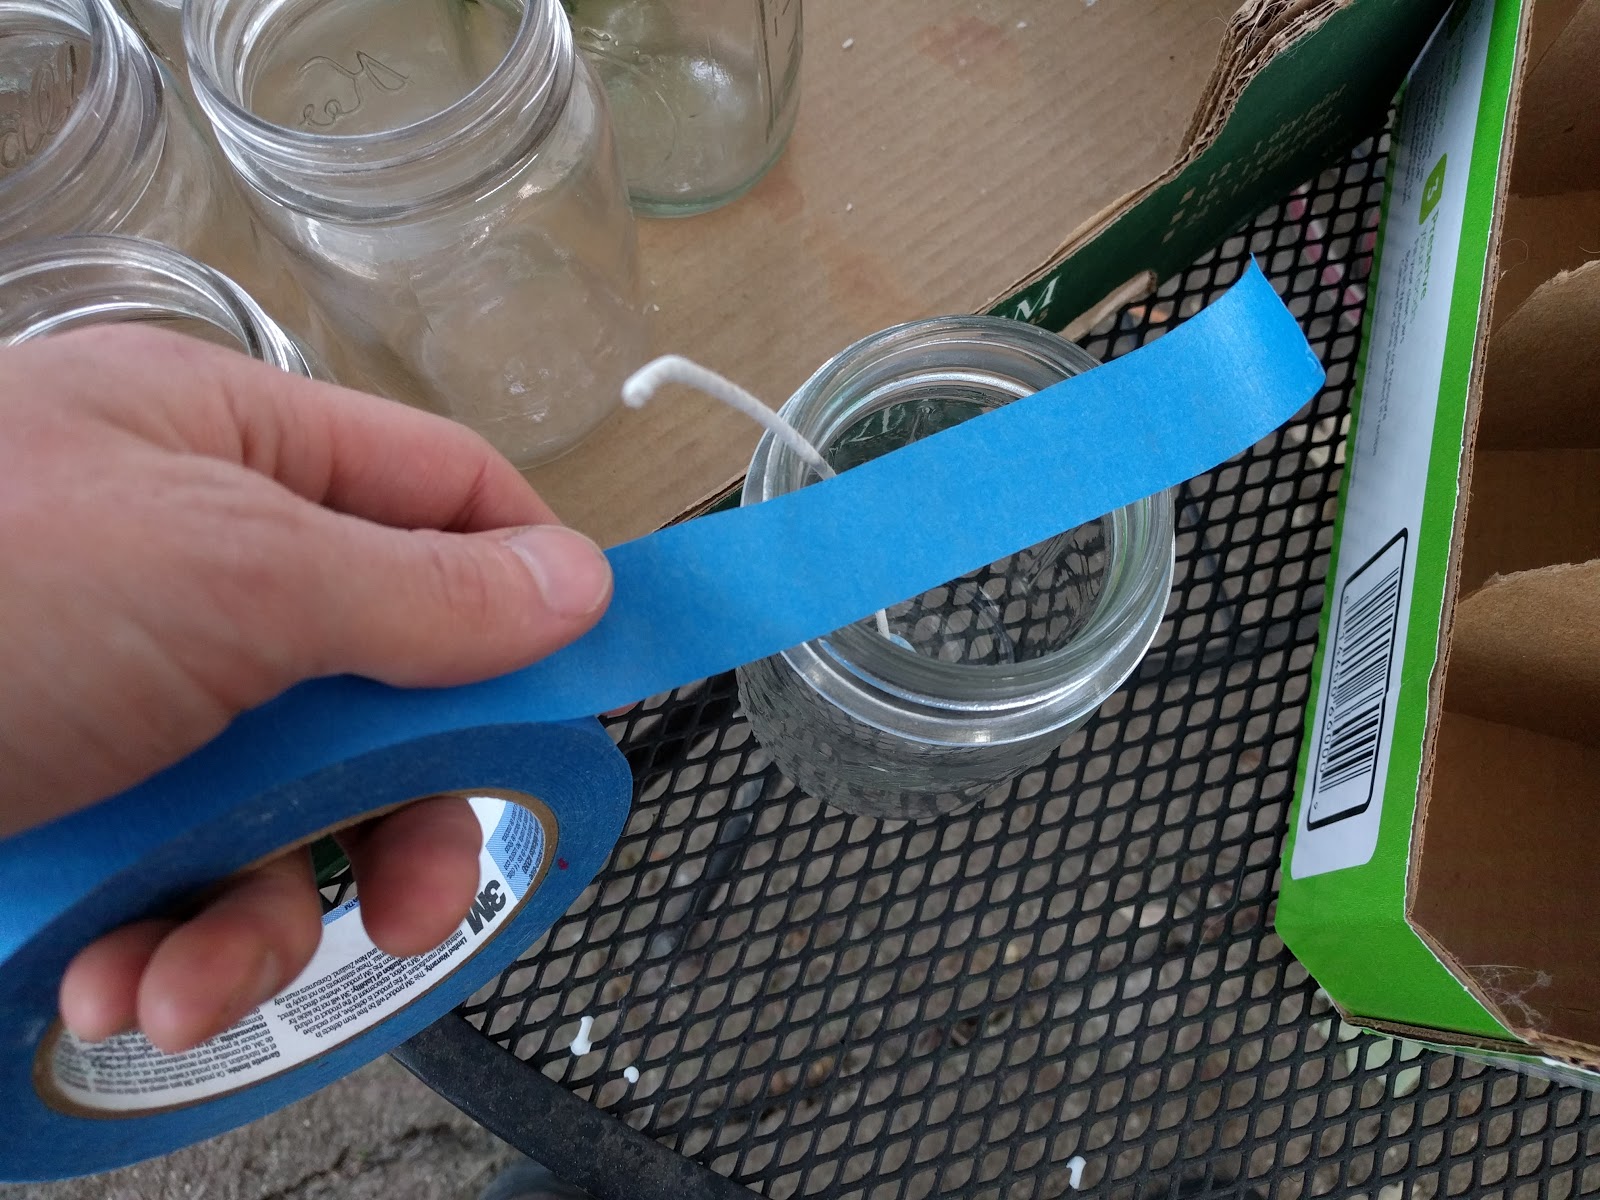
Use Painter's Tape To Hold Them Center
We've seen many ideas for how to secure the wicks so that they stay centered (pencils, clothespins, etc.) but we've found that painter's tape is easier and works just as well. We thought that the clothespins were a good idea until they kept falling in!Simply cut a length of tape that can span the jar rim, poke a small hole with the end of your knife, slide the wick through, and secure the tape so that the wick is centered.


Ready To Pour?
Periodically check the temperature while you're prepping the jars. When the temperature gets down between 130-140°F you can start to pour. It takes a while for the temp to drop within that range so you should have plenty of time to prep the jars, but if you find yourself out of time, just heat the wax up again. Be sure to stir before checking the temperature after reheating.
You'll see in the picture that we waited a bit long before checking. I recommend shooting for 135°F so that you don't let it cool too much if you're slow at pouring.

Start Pouring
Put on your oven mitts, grab your funnel, and get to pouring. Since we made a big batch, we split it between two #10 cans to make pouring easier. If you have something like this to pour with, or if you have good aim, then maybe you won't even need a funnel. We use a crumby old funnel that we should have thrown away long ago.

Two People Makes The Job Easier
I recommend having someone else with you to help at this point. They can hold the funnel and watch the level as you pour. You'll notice that we aren't using much wax per candle in this batch because these candles are for a single night event and we want to stretch the wax as far a possible.
Finishing Up
After you've finished pouring the wax, do a quick check to make sure you didn't bump any of the wicks. If any wicks need adjusting, use a light touch because the wax holding it down will be softer.
The wax should be solid in about 30-60 minutes but you should let your candles set up for 24 hours before cutting wicks and lighting. Use a long pair of scissors to trim the wicks to 1/4 inch, and keep the wick trimmed before you light each time.

Tips And Tricks
Problems With Pitting
Be sure to pour your wax at a temperature between 130-140°F or else your will get pitting and separation like this. Don't be worried because your candle will still burn just fine, it just doesn't look as nice. We were not too concerned with this batch because we will be hanging them from trees at an evening event.

Reuse The Tape
Don't waste you're painter's tape, reuse it on the next batch! We just stick all of the tape to an empty bag until it's time for the next batch.

Use Old Jars That You Can No Longer Be Used For Canning
Although the jars can be reused after the candles burn up, cleaning can be a bit of a chore. We make sure to use any old chipped jars that can no longer be used for canning first. If you want to clean the candles completely of wax, place them in the freezer for a few hours to make removing the wax a lot easier. Or just simply do what we do and leave them on the porch until winter.

Make A Hanging Candle
We like to hang our candles with a loop of thin wire twisted around the lip of the jar like in the pictures below. Then just attach some string or strong fishing line to the wire loops. Put a weight on the other end of the string and throw it over a tree branch, light your candle, and hoist it up.


What Do You Think?
If you have any tips, tricks, or comments that you'd like to add, please leave them in the comments section below. If you'd like to add a link to your similar blog post or video (maybe you add scent to your candles?), feel free to link it below. Thanks!


Comments
Post a Comment